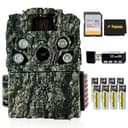
The four specs that actually matter
1. Trigger speed
The single most important number, and the one budget cameras used to be worst at. Trigger speed is the gap between motion detection and the photo being taken. Under 0.3 seconds is good; under 0.2 is very good; 0.5 seconds and slower means you will regularly photograph the back half of a deer.
Trigger speed matters most on a trail where deer are walking past the camera. It matters far less over bait or a food source where animals stop and linger. If you are running cameras on travel routes, weight this heavily. If you are watching a feeder or a scrape, you can relax it.
2. Flash: no-glow, low-glow or white
- No-glow (940 nm)— genuinely invisible. Costs you some night-image brightness and range because the wavelength is less efficient. This is what you want on any spot you intend to hunt.
- Low-glow (850 nm)— brighter night photos, longer flash range, and a faint red glow deer can see. Fine for inventory on ground you do not hunt hard; a mistake on a pressured public trail.
- White flash— color night photos, and it lights the woods up. Useful only for a security camera or a spot you genuinely do not hunt.
Note that “no glow” is used loosely in budget listings. The reliable check is the LED wavelength: 940 nm is truly invisible, 850 nm is not. Cameras that publish the number are telling you something the ones that do not are avoiding.
3. Detection range and angle
Detection range is how far the passive infrared sensor picks up motion, typically 60 to 100 feet on budget cameras. Detection angle is how wide that cone is. A wide angle catches more but produces more false triggers from moving branches, and false triggers eat batteries and card space.
The practical point is that detection range and flash range should roughly match. A camera that detects at 100 feet but only illuminates to 50 will give you a lot of black night photos of nothing.
4. Megapixels, which matter least
Budget cameras advertise 32, 40, 56 megapixels and more. Most of those figures are interpolated— software-upscaled from a much smaller sensor, typically 5 to 8 real megapixels. The number on the box is close to meaningless as a comparison tool.
What matters for a hunter is whether you can tell one buck from another and see antler detail, and every camera here does that. Never choose a camera on megapixels over trigger speed. It is the spec budget makers inflate precisely because buyers rank it highly.
Cellular or not?
A cellular camera sends photos to your phone over a mobile network. A standard camera stores them on an SD card that you have to walk in and collect.
The hunting argument for cellular is not convenience — it is intrusion. Every card pull is a trip into your hunting spot, leaving scent and pushing deer. On a small property or a pressured public piece, checking cards can genuinely cost you the hunting you were scouting for. A cellular camera removes that entirely.
The costs are real. Cellular cameras require a paid data plan on top of the camera price, so the cheap camera has an ongoing bill attached. They need usable cell signal at the tree, which is exactly what the back of a big public tract does not have. And they eat batteries faster because transmitting costs power.
The budget rule: run standard cameras on ground you can check without pressure, and put a cellular camera on the one spot you most want to avoid walking into. That is a better use of money than making everything cellular.
Batteries and cards: the hidden running cost
A trail camera is not a one-time purchase. Budget for:
- Lithium AA batteries. More expensive than alkaline and worth it. Alkalines lose most of their capacity in the cold and can leak inside the camera, which destroys it. Lithium AAs hold up through winter and last several times longer.
- A decent SD card.Class 10 or better. Cheap cards are the most common cause of a camera that “stopped working.” Buy the size the maker recommends, not the largest you can find.
- A python cable lock, if you hang cameras on public ground. It will not stop a determined thief but it stops the opportunist.
One camera with lithium batteries and a good card outperforms three cameras with alkalines and bargain cards, and costs less over a season.
How to actually hang one
- Face north. Pointing a camera east or west means sunrise and sunset wash out your photos and trigger the sensor constantly. North is the reliable default.
- Angle across the trail, not straight at it. A camera perpendicular to a trail sees a deer for a fraction of a second. Angled down the trail at roughly 45 degrees, it sees the animal approaching, which forgives a slower trigger.
- Set it at deer-chest height and angle it down slightly. Roughly waist height on a person, tilted down, keeps the frame full of animal rather than sky.
- Clear the vegetation in front of it. Grass and branches moving in the wind cause thousands of false triggers, which drains batteries and buries real photos.
- Check it as rarely as you can stand. Every visit costs you scent. Two to four weeks is a reasonable interval; more often than that and you are hunting the camera rather than the deer.
Where cameras fit in a budget kit
Trail cameras are a scouting tool, and scouting is where budget hunters get the best return on money because it is cheap and it compounds. A camera that shows you a food source is only used at night saves you a dozen wasted evening sits. Our public-land gear list shows where cameras sit in the wider kit, and deer hunting on a budget covers the scouting-first approach they support. Cameras also tell you when to call rather than just where to sit — the budget deer call picks are what to carry once the card shows bucks on their feet in daylight.