How to Glass for Deer
The gap between a hunter who finds deer and one who does not is almost never the binocular. It is where they sit, when they look, and whether they move the glass in a pattern or at random.
How this is funded: we earn a commission if you buy through our links, at no extra cost to you. It never changes which product we recommend, and we’ll tell you plainly when we’d skip one. Full disclosure.
There is an uncomfortable fact underneath most binocular shopping. Two hunters can sit on the same ridge, in the same light, looking at the same two hundred acres. One will find four deer and the other will find none. The difference is almost never the glass. It is that one of them is searching and the other is looking.
This guide is about the searching part, because it is free, and because it returns more animals per dollar than any upgrade you can buy. If you are still choosing a pair, our binocular buying guide covers that decision. If you already own one, this is the thing that makes it work.
1. Sit down. Everything else follows from this.
Standing to glass is the single most common mistake, and it fails for three separate reasons at once.
Standing, you have no rest, so your hands shake and 10x magnifies the shake along with the deer. Standing, you get tired within a few minutes, so you cut the search short. And standing, you are a vertical silhouette against the sky, which deer read at distances that would astonish you.
Sit, put your elbows on your knees, and the shake mostly disappears. That is a bigger optical upgrade than a hundred extra dollars of glass, and it costs nothing. If you can get your back against a trunk and the binocular against a branch, better again. The single best cheap accessory in this category is not a binocular at all — it is a lightweight seat that lets you stay comfortable for an hour, because an hour is roughly how long real glassing takes.
2. Glass a grid, not a landscape
Watch an inexperienced hunter with binoculars and you will see the same motion every time: a smooth pan left to right across the whole hillside, then down, then a shrug. That covers the ground in about ninety seconds and finds only deer that are standing broadside in the open, which is the one kind you did not need optics to see.
The method that works is boring on purpose:
- Start at the near edge. Deer bed closer than you expect and the near ground is where most hunters never look. Begin at your feet and work outward, not at the far treeline and work back.
- Take one horizontal band at a time. Pick a band the height of your field of view and move across it in overlapping steps, left to right.
- Stop at every step. Three to five seconds per frame, minimum. Your eye needs time to resolve detail out of a static image, and a moving image gives it none. This is the step everybody skips and it is the step that matters.
- Drop one band and come back the other way. Right to left. Overlap the bands slightly so nothing falls between them.
- When you reach the top, start over. The second pass finds animals the first pass missed, because they moved, because the light changed, or because you were not warmed up yet. Three passes is not excessive.
A hillside worked this way takes twenty to forty minutes. That feels absurd the first time and stops feeling absurd the first time a bedded buck materializes in a spot you had already looked at twice.
3. Look for parts, not deer
A whole deer standing broadside in the open is rare and you will spot it without help. What you are actually hunting for is fragments, and knowing which fragments changes what your brain flags:
- Horizontal lines. A forest is overwhelmingly vertical. A deer’s back is horizontal. Anything level and straight in a world of trunks deserves five more seconds.
- The ear flick. Bedded deer are motionless except for ears, which move constantly. It is the most reliable giveaway in the woods and it is only visible if the glass is still.
- The wrong shade of brown. Deer hide is more uniform in color than leaf litter or bark. A patch that is too even is worth resolving.
- Black on gray. A nose and eyes are genuinely black, and nothing else in a winter wood is.
- A branch in the wrong plane. Antlers read as bare twigs until they move. If a branch has no trunk connecting it to anything, look harder.
4. Glass when the light is doing you a favor
Deer move most in the first and last hour of legal light, which is well known. Less well known is that those hours are also when the light itself is helping you.
Low-angle sun throws long shadows and rakes across the terrain sideways, so a bedded deer casts a shadow with an animal-shaped outline and its back edge catches a rim of light. At noon the sun is overhead, shadows collapse underneath objects, contrast flattens, and everything reduces to the same gray-brown. The same deer in the same bed is significantly harder to resolve at midday than at 7 a.m. through the same binocular.
The exception is bitter cold. On a genuinely cold day, deer will get up and feed in the warmest part of the afternoon, and almost nobody is watching. That is one of the few free advantages available to a public-land hunter, and it costs nothing but sitting still while everyone else is back at the truck.
5. Glass into the wind, and glass what you cannot walk to
Two positioning rules that make the technique pay off.
First, put the wind in your face or across you. Finding a deer you have already scented is a wasted hour, and a whitetail carries something like 297 million olfactory receptors against a dog’s 220 million. Wind discipline comes before optics in the hierarchy every time — our scent control guide works through the order.
Second, glass the ground you cannot easily walk. The highest-value glassing on public land is the far side of a creek bottom, the shelf below a bluff, the pocket of timber that requires a mile of walking to reach. Hunters walk the easy ground and pressure it; the deer relocate to the ground that is annoying to get to. Optics are how you check that ground without spending the morning and your scent on it.
6. The mistakes that cost the most
- Panning instead of stepping. Continuous motion gives your eye nothing to resolve. Stop, look, move, stop.
- Glassing only the far edge. The near ground holds animals and gets ignored.
- Quitting after one pass. Deer that were not there on pass one are there on pass three.
- Glassing standing up. Shake, fatigue and a skyline silhouette, all at once.
- Leaving the binocular in the pack. A chest harness is the cheapest thing in this article and it is the difference between glassing forty times a day and four. A pair on a neck strap swings into your bow, bangs on climbing sticks, and ends up stowed by mid-morning.
Where the money genuinely helps
None of this means glass does not matter. It means the order matters. Technique first, because it is free and it is most of the gap. Then a harness, because it decides how often you use what you own. Then better optics, because the last twenty minutes of legal light is a real problem that better glass genuinely solves and no amount of grid work will.
The three pairs below are the ones we would put the money into once the technique is in place: the best glass in the budget bracket for that final light window, the most optical performance per dollar, and the cheapest pair that still carries a no-fault lifetime warranty. The full field is in our budget binocular roundup.
The three binoculars this technique is worth buying
Ranked on price-per-performance — the specs that matter divided by what it costs. Select a row to jump to the full write-up. We have not field-tested these — here is exactly what we do instead.
| # | Product | Glass / mag | Score | Price |
|---|---|---|---|---|
| 1 | 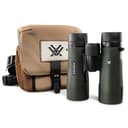 Vortex Diamondback HD 10x42 Best glass for the last ten minutes The budget binocular the rest get measured against. HD glass that holds detail into last light, waterproof, and backed by Vortex's no-questions VIP warranty — the safest first pair a public-land hunter can buy. | 10x42 · HD | 9.2/ 10 | |
| 2 | 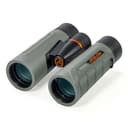 Athlon Optics Talos G2 HD 10x42 Most glass per dollar The most binocular per dollar under $150 right now. HD glass and long eye relief in a waterproof body — Athlon is the brand that keeps showing up when hunters compare glass blind rather than by badge. | 10x42 · HD | 9.0/ 10 | $139.99View on Amazon Price as of October 20, 2026. #ad How we’re funded |
| 3 | 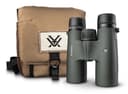 Vortex Triumph HD 10x42 Cheapest pair with a lifetime warranty The cheapest way to get a Vortex VIP warranty around your neck. The Triumph is Vortex's entry line, and it exists precisely for the hunter who wants the warranty safety net at the lowest possible entry price. | 10x42 · HD | 8.8/ 10 | $99.00View on Amazon Price as of October 20, 2026. #ad How we’re funded |
Frequently asked questions
How do you glass for deer properly?
Sit down, get the binocular on a rest, and move it in a deliberate grid rather than swinging it around. Work one horizontal band at a time from the near edge outward, pausing every few seconds to let your eye actually resolve what is in the frame, then drop to the next band and work back the other way. Cover the whole area once slowly, then start again. Most hunters glass a hillside in ninety seconds and see nothing; the same hillside worked properly takes twenty minutes and produces animals.
What time of day is best for glassing deer?
The first hour after legal light and the last hour before it closes, by a wide margin. Deer move most in those windows, side light in the early and late sun casts shadows that make a bedded animal's outline readable, and the flat overhead light of midday washes everything into the same gray. In cold weather add midday to the list — deer will feed in the warmest part of a bitter day, and almost nobody is watching then.
Do you need a tripod to glass for deer?
Not for whitetail hunting in timber, where distances are short and you are usually glassing from a stand or a sitting position with a rest available. A tripod becomes genuinely valuable when you are glassing open country at long range for an hour at a time, because handheld shake at 10x hides exactly the small movements you are hunting for. If you cannot justify a tripod, a knee, a pack, a tree trunk or a shooting stick delivers most of the benefit for nothing.
What are you actually looking for when glassing for deer?
Almost never a whole deer. You are looking for pieces and anomalies: a horizontal line in a world of vertical trunks, the flicker of an ear, a patch of color that is too uniform to be leaves, the black comma of a nose, or an antler tine that reads as a bare branch in the wrong place. Bedded deer show you a back line and a head, and that is all. Train yourself to look for parts and the woods get considerably more crowded.
Is 8x or 10x better for glassing deer?
Eight power for timber and freehand glassing, ten power for open country and glassing from a rest. Ten magnifies your hand shake as much as it magnifies the animal, and in thick cover the wider field of view of an 8x helps you catch movement you would otherwise pan straight past. If most of your glassing is across cut fields, river bottoms or western slopes with something to brace against, take the 10x.
Can you glass for deer with cheap binoculars?
Yes, and technique closes most of the gap. A hundred-dollar binocular used from a rest in a deliberate grid will find more animals than premium glass swung around at random, because the limiting factor for most hunters is search pattern rather than resolution. Where price genuinely buys you deer is the final twenty minutes of legal light, when better glass resolves detail that cheap glass has already smeared. Everything before that is mostly you.
Sources
- How to Find a Great Binocular on a Budget — Vortex Optics — Manufacturer education on magnification (8x42 vs 10x50), objective lens, coatings and prisms (accessed July 22, 2026)
- To Kill Mature Bucks, Reveal the Wind — National Deer Association — A whitetail carries roughly 297 million olfactory receptors to a dog's 220 million; scent forms a consistent cone above 8-10 mph and eddies unpredictably below it (accessed August 12, 2026)
- The Hunter's Guide to Deer Vision — National Deer Association — Deer have two cone photopigments rather than three and no red cone; they see blues and greens well, lack a UV filter, and cannot distinguish orange from red (accessed August 12, 2026)
- Hunting — US Forest Service — USFS rules for hunting on National Forest System land — state-law compliance and area restrictions (accessed July 22, 2026)
Keep reading
Best Budget Hunting Binoculars
Five 10x42 pairs compared on glass, warranty and live price.
See the picksHow to Choose Hunting Binoculars
8x vs 10x, exit pupil and coatings — the specs that decide what you see at dusk.
Read the guideBest Budget Hunting Tripod
The grid method is exhausting handheld and comfortable on a tripod. Five compared on height, rated load and carry weight.
See the picksScent Control on a Budget
Glassing gets you eyes on deer. Wind discipline is what keeps them from leaving.
Read the guideDeer Hunting on a Budget
Where optics sit against everything else you could spend the money on.
Read the guide