How to Repair Waders
Finding the hole is the hard part; the patch costs a few dollars. The two leak tests that work, what bonds to neoprene, and the three failures that mean a wader is finished rather than broken.
How this is funded: we earn a commission if you buy through our links, at no extra cost to you. It never changes which product we recommend, and we’ll tell you plainly when we’d skip one. Full disclosure.
The repair is the easy part. Finding the hole is what people get wrong, and the single most useful rule is that water runs downhill inside a wader — so the leak is almost always higher than the spot where you felt wet. A few dollars of flexible urethane adhesive fixes nearly every leak a budget wader develops, and it will outlast the rest of the garment if you clean the surface properly and let it cure.
This matters more on cheap waders than expensive ones, for an obvious reason: of the five waders we track, only one publishes a warranty term at all. TIDEWE states a one-year warranty on its wader line; nobody else in the budget field publishes one. At that end of the market, the repair kit is the warranty.
Step one: narrow it down before you test
Put the waders on dry, in the garden, and note exactly where you first feel damp. Then ignore that location and search above it. Water enters at the hole, runs down the inside of the fabric, and pools at the lowest point — usually the boot. A wet sock most often means a hole at the knee, the thigh or the seat.
The high-probability spots, in order, are the knees (abrasion from kneeling and from brush), the seat (sitting on logs, tailgates and buckets), the inside thigh where fabric rubs against itself, and the seam where the boot joins the leg.
Step two: the two tests that actually work
The water test
Turn the waders inside out, close off the leg below the suspect area, and fill that section with water. Watch the outside for a minute or two. A leak shows as a bead that forms, grows and runs. Mark every hole you find with a marker or a piece of tape before you drain them, because a dry wader looks identical everywhere.
The light test
In a dark room, put a bright light inside the wader leg and look from the outside. Pinholes glow. This is far more effective on thin breathable fabric than on 3.5–5 mm neoprene, which is too thick and too opaque for the trick to work well — for neoprene, use water.
If both tests come up empty and you are still getting wet, the leak is probably not a hole at all. See the condensation section below.
Step three: clean, then patch
Adhesive bonds to a clean, dry surface. Mud, fish slime, pond scum and any water-repellent treatment on the face fabric all prevent that, which is the most common reason a patch fails after one trip. Wash the area with mild soap and water, rinse it, and let it dry completely — completely, not nearly.
- Pinholes. A drop of flexible urethane adhesive worked over the hole and a little beyond it. No patch needed.
- Punctures and small tears. Adhesive plus a fabric patch, applied to the outside, with the adhesive extending past the patch edge all the way round.
- Neoprene specifically.Use a neoprene contact cement or a urethane rated for it, and apply to both surfaces if the product says to. The adhesive has to stay flexible — neoprene stretches on every step, and a rigid repair cracks at the edge.
- Seams.Seam sealer rather than patch adhesive, run along the stitch line. Note how much construction varies here: TIDEWE’s own spec page describes triple-finished seams that are stitched, glued and taped, while several budget listings publish no seam construction at all. A triple-finished seam is worth repairing; a seam the maker will not describe is a gamble.
Cure it flat, under light weight, for at least as long as the product states — overnight is the realistic minimum. Then re-run the water test on that exact spot before you stand in 40-degree water and find out the hard way.
When it is not a leak at all
If you are damp all over rather than in one place, and the water test finds nothing, you are probably dealing with condensation rather than a hole. Neoprene is not breathable, and a hard walk to the blind in insulated waders produces sweat that has nowhere to go. The fix is not adhesive, it is layering: a wicking base layer under the waders and less insulation on the walk in. Our layering guide covers the principle, and it applies here exactly as it does under a jacket.
The other non-leak is overtopping — water coming in over the chest in a spot deeper than you judged. That one is not a gear problem, and in moving water it is the genuinely dangerous version of a wet day.
Three failures that mean the waders are finished
- The boot-to-leg seam has separated. That joint takes load and flex on every step. Re-sealing it sometimes works and frequently does not.
- The neoprene has gone stiff and crazed across a panel. That is UV and heat damage, and it is the whole panel, not a spot.
- Three or more new leaks in one season. The material is at the end of its life and you are now patching it every weekend.
If you are at that point, the budget waders roundup ranks the field on published insulation, neoprene thickness and seam construction — and makes the case that 600 gram beats 800 for most seasons.
Making the next pair last longer
- Dry them properly, slowly.Inside and out, out of direct sun and away from heaters. Danner’s published boot-care guidance makes the same point about leather: fast, hot drying does more damage than the water did.
- Never store them folded on the same crease. Hang them upside down by the boots, or lay them flat. A permanent crease becomes a permanent leak.
- Patch the first small hole immediately. Holes grow. A pinhole in October is a tear in December.
- Carry the repair kit in the blind bag. A field patch that gets you through the morning is worth more than a perfect repair next Tuesday.
One last piece of admin that has nothing to do with glue: if you are hunting waterfowl, the federal Duck Stamp requirement applies to hunters 16 and older in addition to your state licence. Patched waders and an unsigned stamp is an expensive combination. Our duck hunting on a budget guide covers the rest of the paperwork and the kit.
The waders this guide applies to
Ranked on price-per-performance — the specs that matter divided by what it costs. Select a row to jump to the full write-up. We have not field-tested these — here is exactly what we do instead.
| # | Product | Insulation | Score | Price |
|---|---|---|---|---|
| 1 | 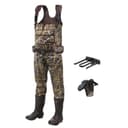 HISEA Chest Waders 600G Insulated Boot Our all-around budget pick The best-balanced budget wader and the one most duck hunters should buy. 600 gram insulation in the boot is the right number for a season that runs from an early-October marsh to a January field, and HISEA is already the brand behind two of the rubber boots we rank — same build language, same honest price. | 600g · bootfoot | 9.0/ 10 | $118.99View on Amazon Price as of October 19, 2026. #ad How we’re funded |
| 2 | 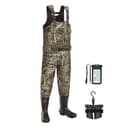 TIDEWE Chest Waders 600G (NE11) The only one here with a published warranty The pick for anyone who wants the specification written down. TIDEWE is the only maker on this page that publishes the whole build on its own site — 3.5 mm neoprene upper, 3M Thinsulate insulation, triple-finished seams that are stitched, glued and taped, and a one-year warranty. It is the most expensive wader here and the only one you can actually compare on paper. | 600g · 3.5 mm | 8.8/ 10 | $149.99View on Amazon Price as of October 19, 2026. #ad How we’re funded |
| 3 | 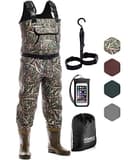 Foxelli Chest Waders 4mm (uninsulated) Uninsulated, and the crossover fishing pick The early-season and crossover pick, and the only one on this page that lists a women's fit. 4 mm neoprene with no insulation rating is exactly right for September teal, for fishing, and for anyone whose wader spends more time walking than sitting — insulation you do not need is just heat you have to carry. | None · 4 mm | 8.5/ 10 | $102.97View on Amazon Price as of October 19, 2026. #ad How we’re funded |
Frequently asked questions
How do you find a leak in waders?
Two tests cover almost everything. Fill the suspect section with water from the inside and watch the outside for a bead forming - this works on neoprene and on breathables. Or, in a dark room, put a bright light inside the leg and look for points of light from the outside, which finds pinholes in thin breathable fabric that the water test can miss. Start higher than the wet spot, because water runs down inside the wader before you feel it.
What glue works on neoprene waders?
A flexible urethane repair adhesive or a neoprene-specific contact cement. The non-negotiable property is flexibility: neoprene stretches every time you take a step, and a rigid adhesive cracks at the edge of the patch within a season. Household superglue and silicone sealant both fail this test.
Can you repair a leaking wader boot?
Sometimes. A puncture in the rubber boot itself can take a patch, but the most common wader-boot leak is at the seam where the boot is bonded to the neoprene leg, and that joint flexes under load every step. Seam failures there can be re-sealed and often do not hold. If the boot-to-leg seam has gone on a cheap pair, that is usually the end of the wader.
How long do budget waders last?
It depends far more on care than on price. Of the waders we track, only one publishes a warranty term at all - TIDEWE states a one-year warranty on its wader line - and none publishes an expected service life. What shortens it is predictable: storing them folded at the knee, drying them in direct sun or on a heater, and walking through barbed wire and brush without patching the first small hole.
Are waders worth repairing or should you replace them?
Repair pinholes, punctures and small tears - that is a few dollars of adhesive against the price of new waders, and a patch done properly outlasts the rest of the garment. Replace when the failure is structural: a boot-to-leg seam that has separated, neoprene that has gone stiff and crazed across a whole panel, or three or more new leaks appearing in a single season.
How should you store waders so they do not leak?
Dry them inside and out first, then hang them upside down by the boots or lay them flat - never folded at the same crease, and never stored damp. Keep them out of direct sunlight and away from heaters; UV and heat are what make neoprene stiff and brittle. The same principle applies to boots: Danner's own care guidance is that drying fast and hot damages the material more than the water ever did.
Can you use a tyre patch kit on waders?
On a rubber boot, sometimes. On the neoprene or breathable body of the wader, no - a rubber patch kit is formulated for a different material and a different kind of flex, and it tends to peel at the edge. Buy the repair adhesive made for the material you are patching; it costs little and it is the difference between a repair that lasts a season and one that lasts a morning.
Sources
- Seeker Camo Hunting Waders for Waterfowl Hunting — TIDEWE — The maker's spec data for its chest waders: a "3.5 mm neoprene upper with tough poly / jersey shell", 3M Thinsulate ultra insulation, "triple-finished seams that are stitched, glued and taped", a "Quick-drain chest hand-warmer pocket with small pocket inside", adjustable neoprene suspenders, and a published "One Year" warranty on this line. No garment weight is published (accessed October 11, 2026)
- Waterproofing — Danner Care — Boot-maker care guidance: spray suits mixed leather and textile boots, gel is for full-grain leather only, and reapplication runs from daily under heavy use to as-needed under light use (accessed August 19, 2026)
- Federal Duck Stamp — U.S. Fish & Wildlife Service — Federal requirement that waterfowl hunters 16+ buy a Duck Stamp; 98% of the price funds habitat (accessed July 22, 2026)
Keep reading
Best Budget Hunting Waders
Five neoprene chest waders ranked on published insulation, thickness and seam construction.
See the rankingsDuck Hunting on a Budget
The hunt waders exist for, costed out - including the one item you cannot improvise.
Read the guideHow to Waterproof Hunting Boots
The same maintenance logic applied to leather and to the boot half of a wader setup.
Read the guideBest Budget Hunting Boots
When the walking matters more than the water - the boots we rank for public land.
See the rankings